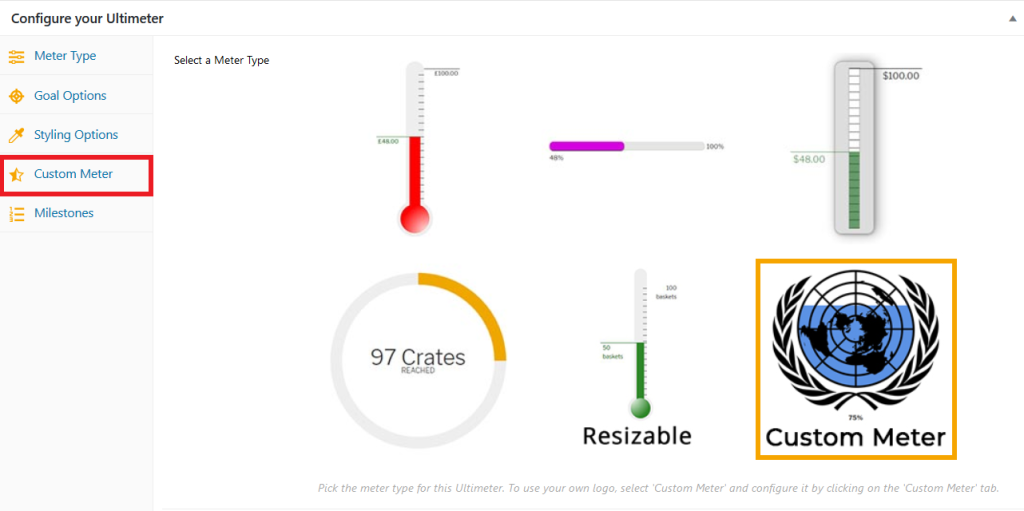
Once you have selected the custom meter from the meter types panel, the Custom Meter menu item will appear, as below.
In this panel, you will see four settings. Let’s look at what each one does.
Select a Base Image #
Each custom meter is actually made up of two different images, a base image and an overlay image. This is where you upload your base image. Think of your base image as what your visitors would see if your progress is at 0%. So this could be an empty house, or a box that isn’t filled in. If you make a mistake, hit the red cross at the top left of the preview image to start over.
Select an Overlay Image #
Select your overlay image here. Think of the overlay image as what your visitors would see if you had reached your goal. This is normally an image totally filled in with colour.
Important: your overlay image must have the same dimensions as your base image. Otherwise, the calculation used to determine where the progress should be will not match your actual campaign progress.
Raised Amount #
Custom meters can now track any metric in the goal options tab, and we recommend you choose one of those. If you have previously used this box to enter a percentage, simply delete the entry to use the new goal options, or keep it as it is to continue to override them. If you have just installed Ultimeter, you will probably want to leave this box blank.
Direction #
Choose which way your custom meter should fill. For a thermometer effect, use Bottom to Top. For a progress bar effect, use Left to Right.
Top and Bottom Offsets #
Offsets allow you to do really cool things with your logo design. They are currently only available for Bottom to Top meters, but if you think they might be useful for meters using other directions, let us know. Let’s look at how they work, with an example.
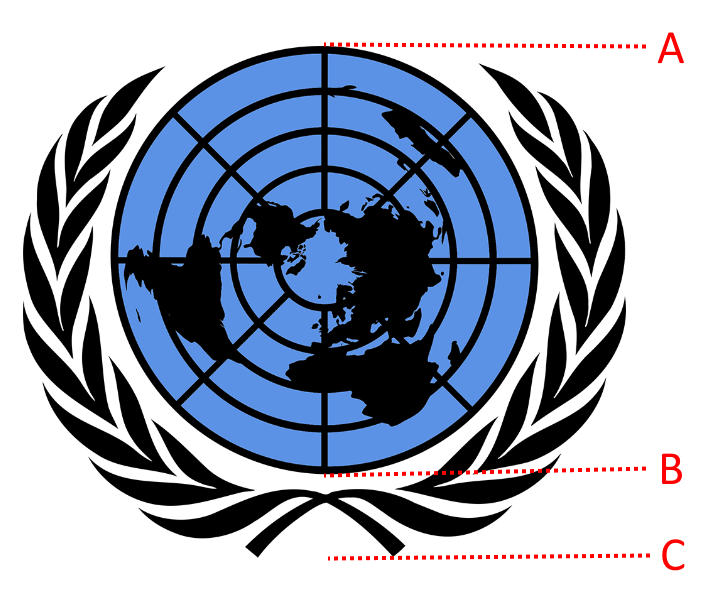
The image above is an overlay image (displayed at 100%). In the base image, the blue fill is removed. Without offsets, the progress would start at position C. This means that until the progress reached around 20%, you would see no change.
Offsets allow you to disregard a portion of the image for calculation purposes. To work out the bottom offset, you simply need to calculate the distance, in pixels, between position C and position B. Any image editing tool should be able to help with this.
Now, when you enter that distance, Ultimeter will calculate behind the scenes the correct starting point for the progress. So in this instance, 0% will now be at position B, and 100% at position A. Note in this example, we don’t need a top offset, but they work in exactly the same way.
If you have used offsets, let us know. We might feature your meter on our blog, and on our social media.
Display Counter #
The final element is a simple option to display the percentage below the custom meter. It features a cool animation in time with the image itself, and gives your visitors an immediate and unambigous display of exactly what you’ve achieved so far. Give it a whirl!


